Using Pinterest and creating pins is great for boosting visitors to your history blog. But, is there a way to create a professional-looking Pinterest pin when you’re not a graphic designer? And, can it be done for free? Well, the answer to both of these questions is ‘yes’ and here I’m going to show you how to create your first Canva Pinterest pin! In full disclosure, some blogging tools I recommend are affiliate partners but only because I use them to help my blog and I genuinely think they can help yours.
What is Canva?
Canva can help you create free Pinterest graphics. Simply put, Canva is a free graphic design tool we have been using here at Smart History Blogging from the beginning. It’s a fabulous free tool that can save you time and money when it comes to creating great pins for Pinterest. We’re not affiliated with them, we just love the platform.
Is it worth my time to do this?
Absolutely! Although Pinterest falls under the umbrella of social media it’s actually a search engine where millions of people can potentially find your pins and click through to your history blog posts.
Much like Instagram, Pinterest is a visual platform, which can be a bit scary. But, here I want to show you how easy and quick it is to create stylish pins. Where Pinterest differs from Instagram is that on IG your audience is likely already following and directly engaging with you but on Pinterest you will need eye-catching pins to get people to visit your profile.
The other interesting thing about Pinterest pins is that whereas Instagram posts will drop down the feed and have less engagements through time, Pinterest pins have longevity and last until you delete them.
Now, first things first, make sure you’ve signed up to Canva and verified your email.
Let’s get started.
Step One – Set Up Your Pin’s Canvas
When you’ve signed up for your account you’ll be presented with a whole host of options. The quickest way to find what you need is by typing in the search bar:
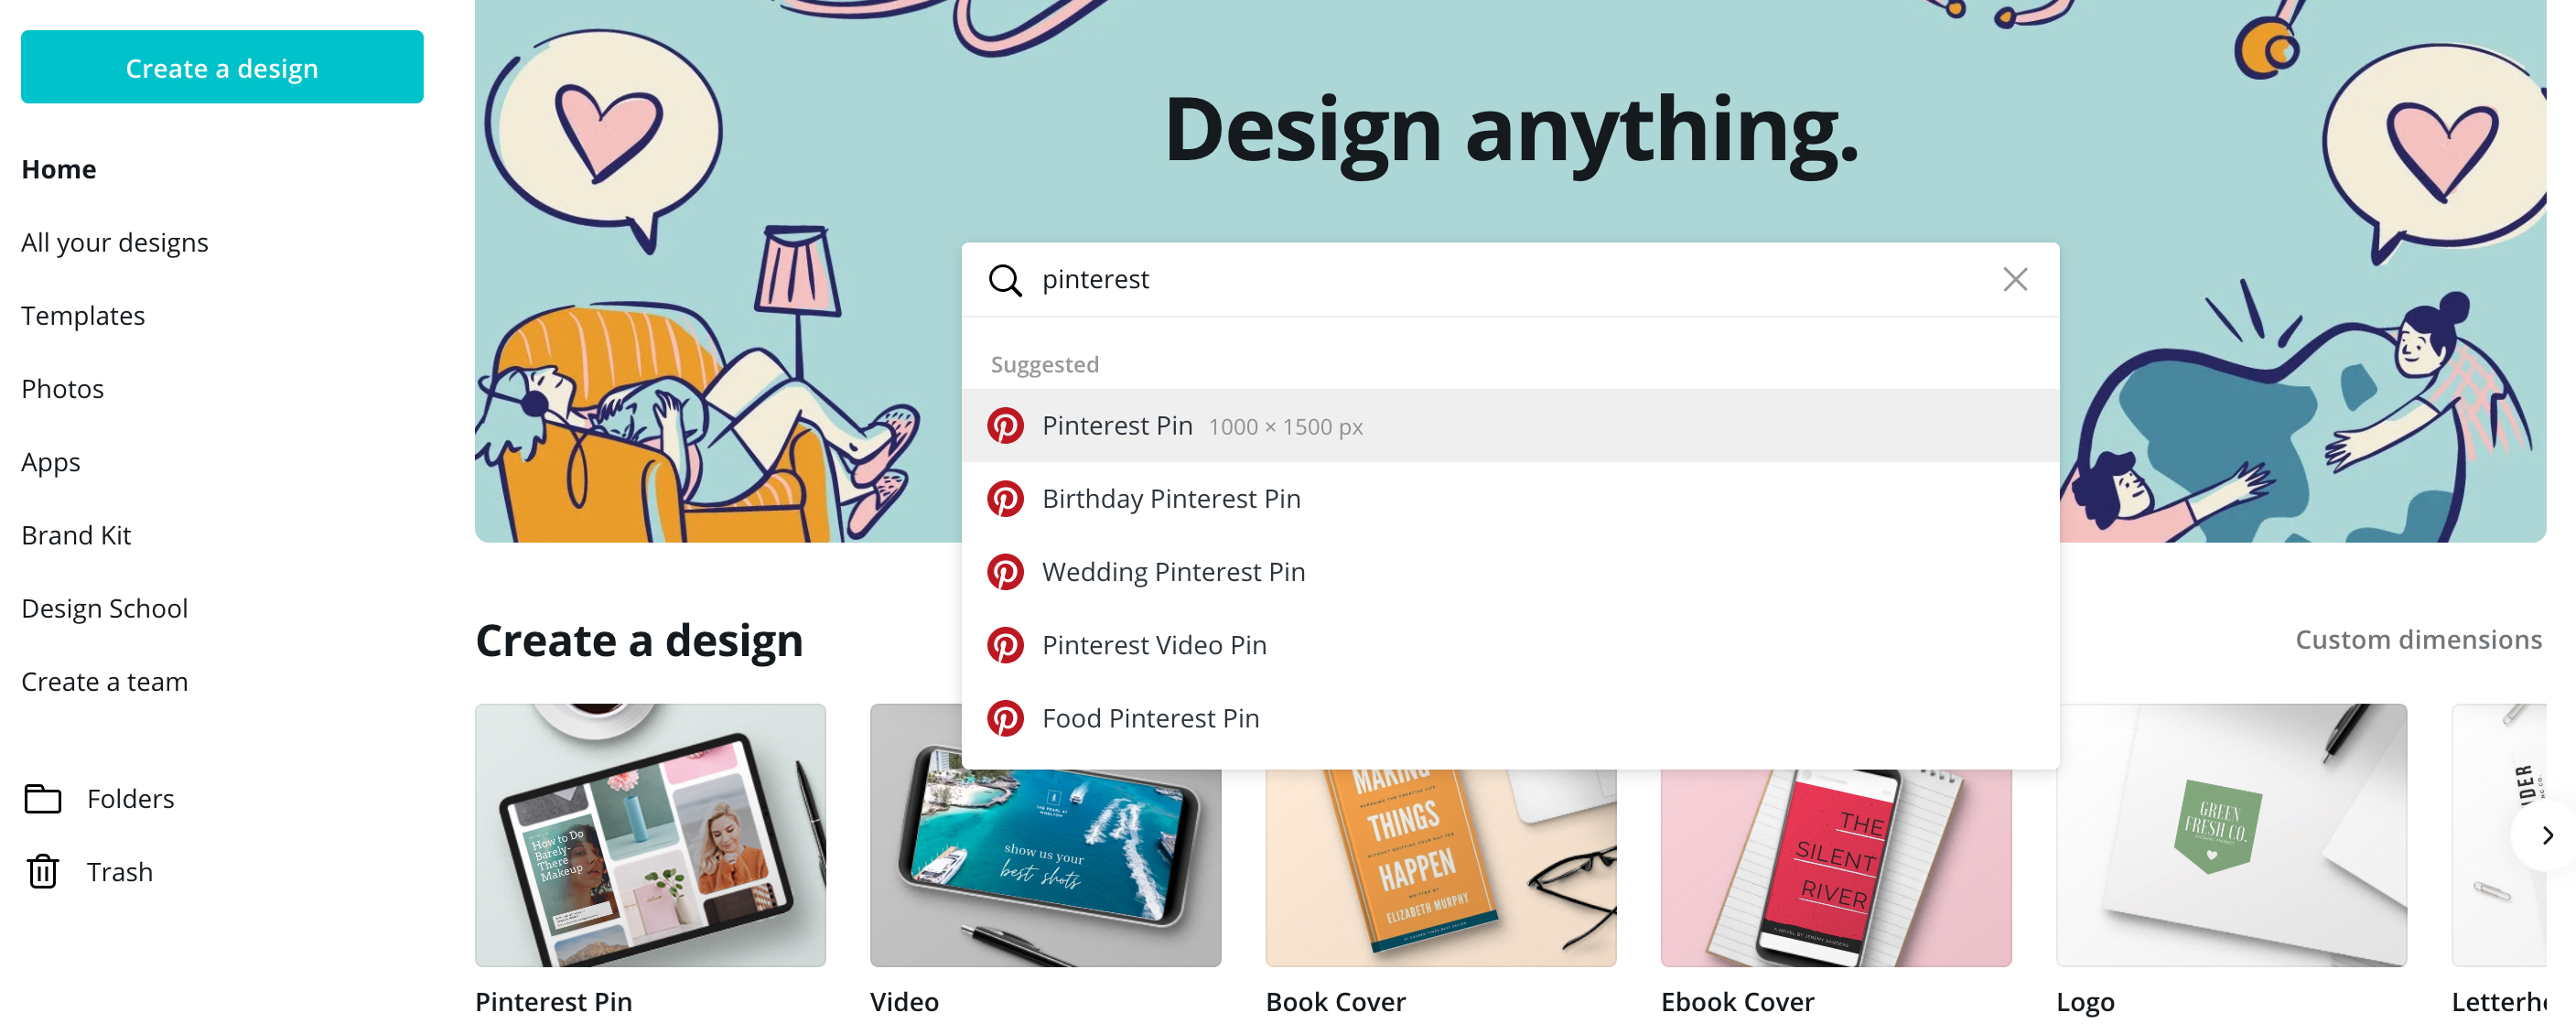
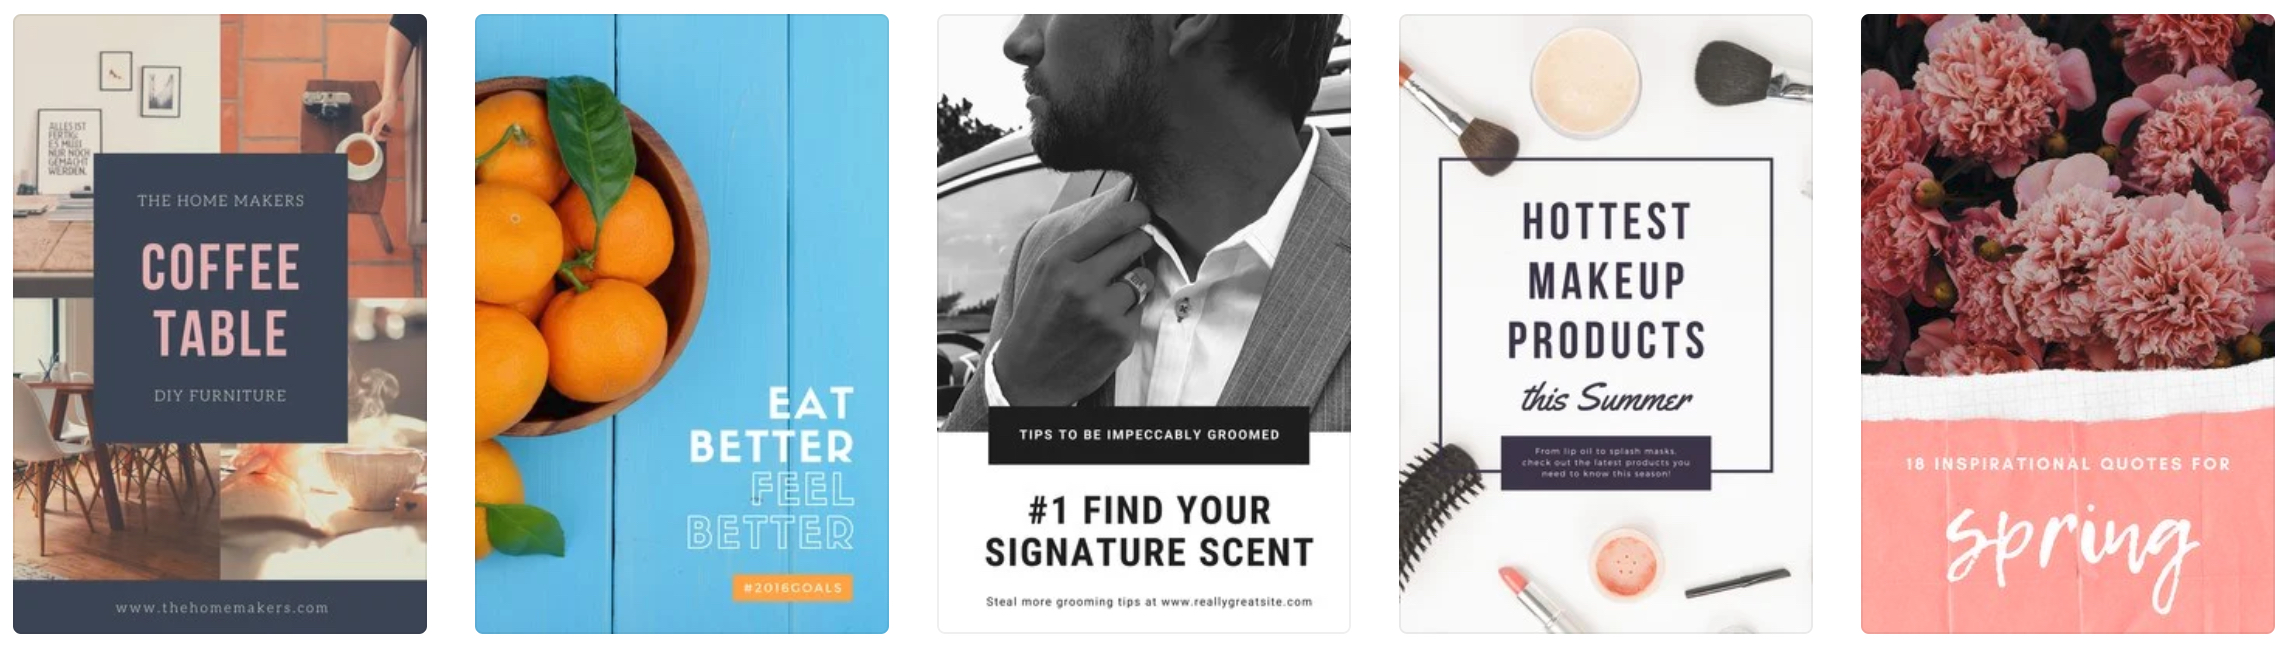
The Pinterest pin size Canva gives you is 1000px x 1500px. This is the best size pin to use as longer pins tend to be more eye-catching. You don’t have to design a pin from scratch as there’s a whole bucketload of great templates on Canva.
If you want to create something from scratch then select the blank design option and you’ll have something like this:

On this screen you can name your design, download, save, duplicate, add design notes, add a background, add elements (shapes, grids, frames, clip art etc) find photos/other images, upload your logo and more.
So now you have a nice empty canvas let’s quickly go over some tips to help you create your design.
Step Two – Decide on Your Brand Colours
Colours for websites are represented by 6 digit codes called hex colour codes. When you’ve chosen colours you like the look of, or you want to use your brand colours, you can use these codes to keep everything you create consistent.
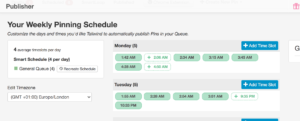
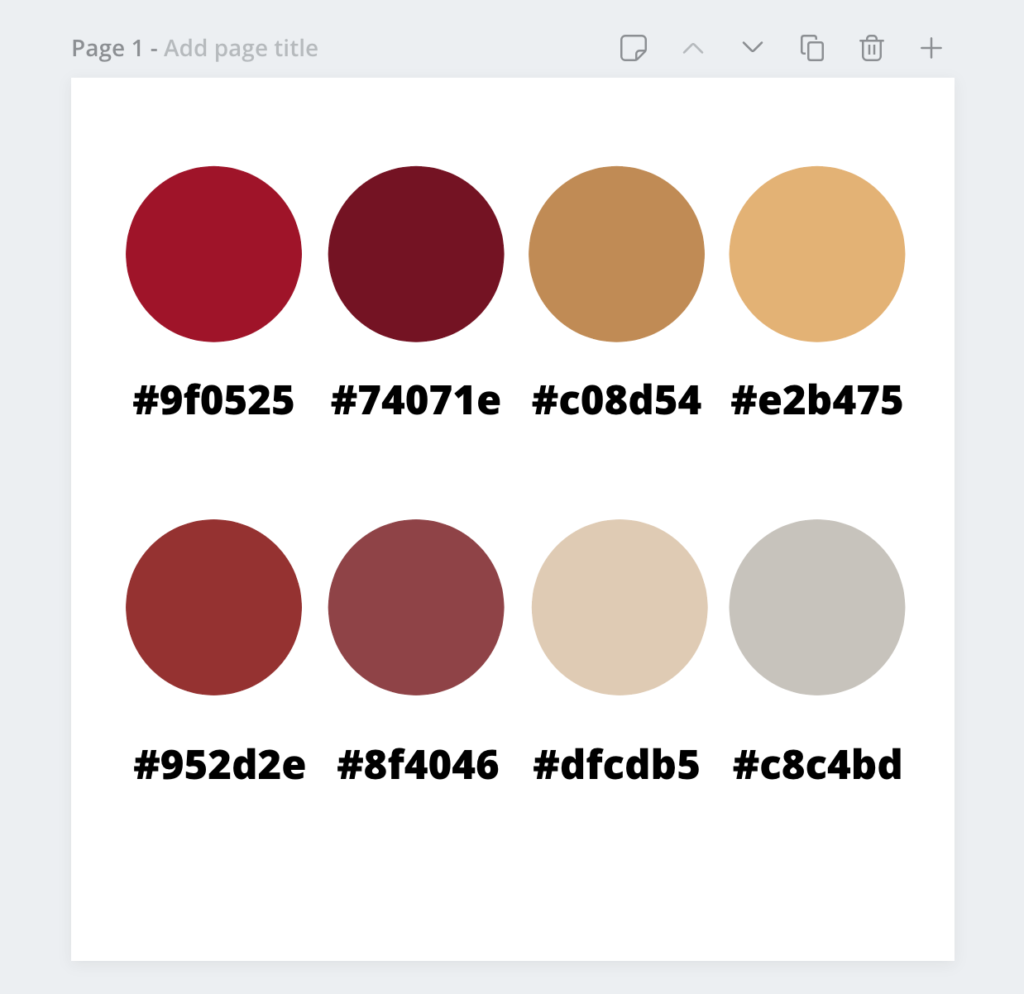
Here’s a quick tip for you that will save you time later on. Setting up your colour chart is great for when you’re moving between designs. On the free version of Canva you’ll be missing the option to export the design for multiple social media platforms. As you move to new designs you’ll have to add your brand colours again. It’s handy to have a colour chart saved in Canva so that you can quickly grab the colours you need. It’s not necessary to do this step of course but it is handy to have around.
Here’s the Smart History Blogging one: As you can see I simply added the colour to circles and put text underneath with the hex codes. That way I can copy/paste the hex colour code whenever I need it.
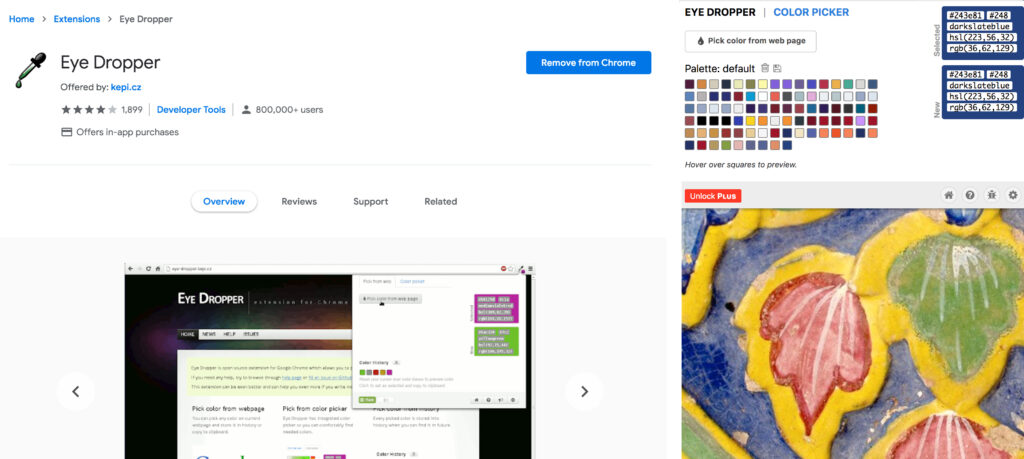
In addition, a useful tool to help you find hex codes is by using a Chrome extension called Eye Dropper. Again you don’t have to do this stage but it’s helpful if you’d like to select colours from anywhere on the web or even parts of your own designs. You can get the plugin here. Once added to Chrome it will appear in the top right corner where you can quickly access it and copy-paste the hex key (top left code.)
Step Three – Start Designing
Ok so let’s start a design. When it comes to graphic design you need to think in layers. Start with your base layer (usually a photo or background) and work up from there. There are two options at this stage, upload your own image or use an image from the catalog on Canva.
If you need help with finding CC0 and copyright-free images you can use online we have a blog post to help you with that here.
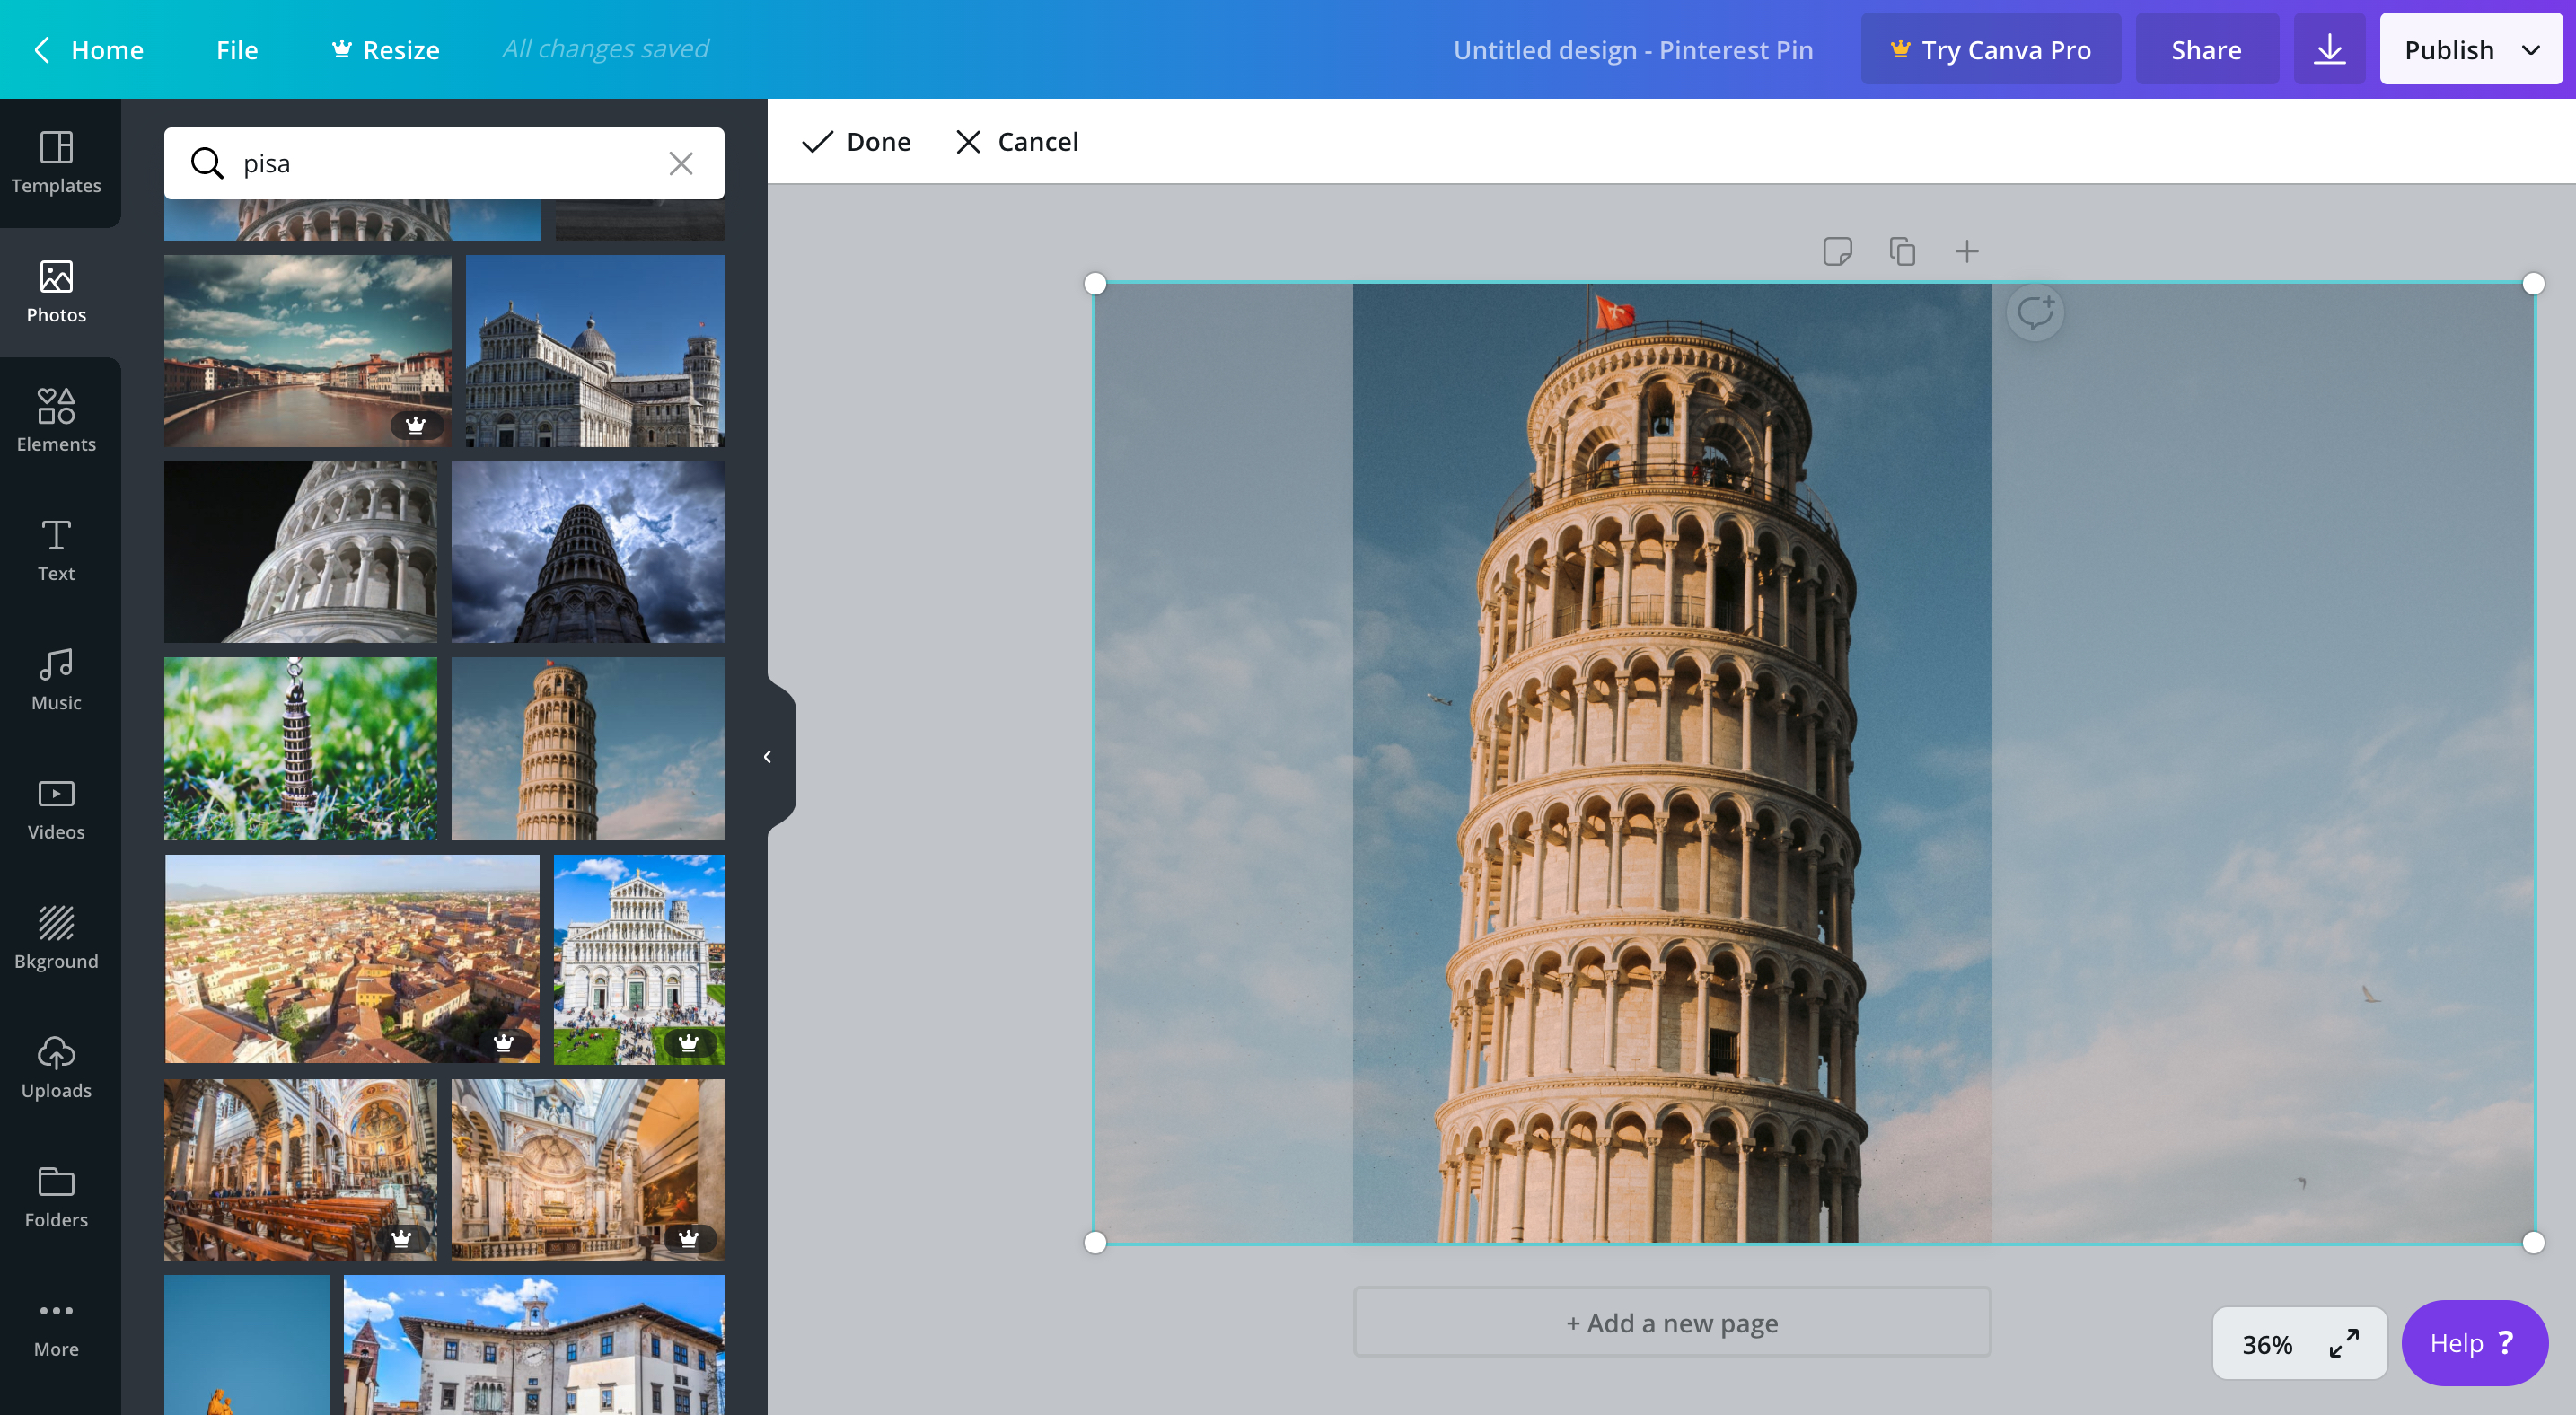
We’ll use one of Canva’s own photographs. To narrow it down type in a keyword to search, such as laptop, books, landmarks, history etc. There are free photos as well as images you can pay for as either a one-off or as part of your subscription. Paid images are indicated by the crown in the bottom right of the thumbnail.
When you choose an image drag it over to the canvas and hover on the left edge, the image will automatically fill the space for you so you don’t have to resize it to fit. It will also be automatically centered. If your image is cropped because of the dimensions of the canvas you can double click to select it and move it around so it fits.
If we put text over the top of this it would disappear into the image. So I recommend using an overlay to fade the image a little and make the text pop. For this all you need is a square shape from the elements tab. Size it to fit the whole image, a section or leave a border as I have done here. Make the colour of the shape white and adjust the transparency slider till you’re happy. You can try experimenting with other overlay colours but for this example we’ll stick with white.
Step Four – Add Text
Now we have a good background lets add some text. Again Canva has a lot of great options for this with combos of fonts that compliment each other. Choosing suitable fonts doesn’t need to be overly complicated, limit yourself to a maximum of three. Swirly detailed fonts might look nice but they are often difficult to read, and for people using their phones to browse Pinterest it can be even worse. So choose fonts that are easy to read. Sometimes just making a font bold can help with this. Sizes, line and letter spacing can be adjusted in the panel along the top.

If you’re working with an especially colourful background image make the font more neutral shades that compliment the image. Or use grey, black and white. Less is more when it comes to font on pin designs.

At this stage, you could add your website name somewhere on your pin so that people know where the pin comes from. That way if they like your content and stumble across another one of your pins they’ll know it’s yours.
Another quick tip for making font pop on Canva is to create a drop shadow. Currently, Canva doesn’t have the option to add an outline to text but if you want to create this effect there’s a little hack you can try.
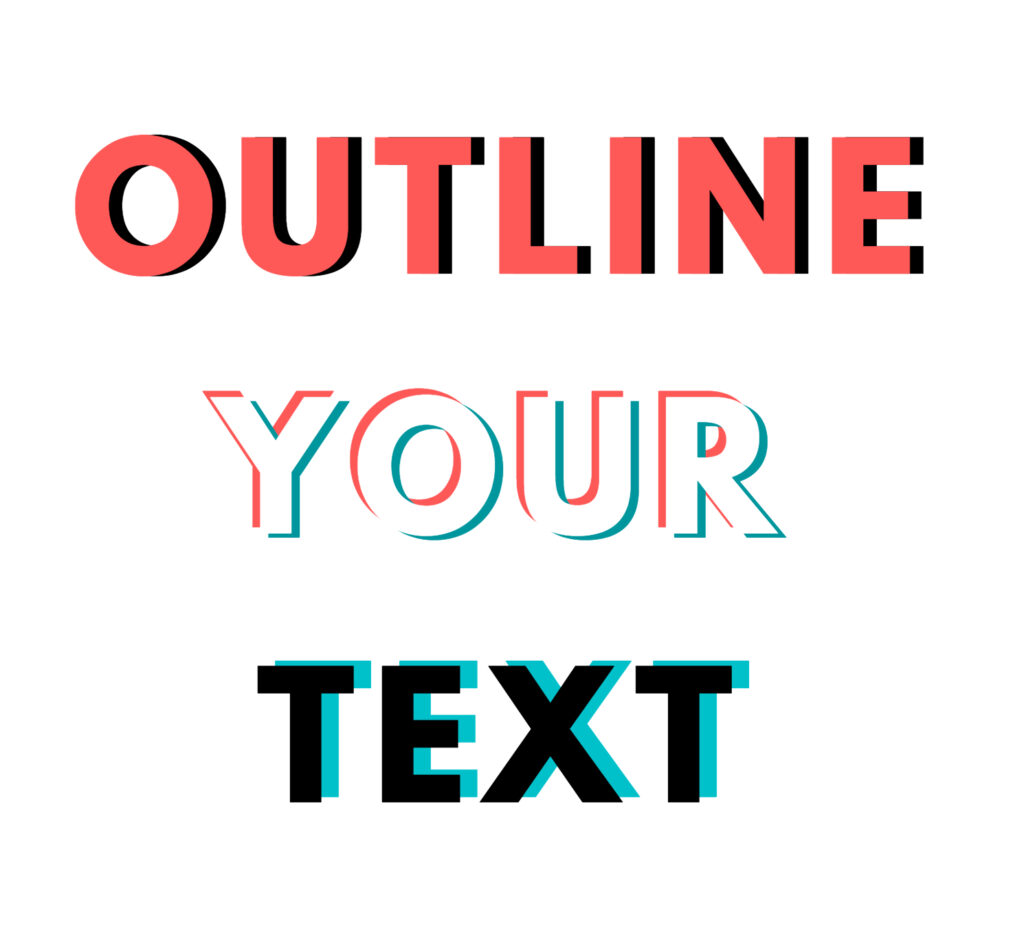
To create these simply copy and paste your font or use the duplicate button, make sure that the line and letter spacing is the same for both of the versions.
Change the colour of one of the lines of text to a more striking colour, then select it and using your keyboards directional keys (or your mouse) move them apart slightly.
For text with three colours like the one in the middle copy-paste the same text again and make it a different colour then offset as before.
Step Five – Do Some Finishing Touches and Export
Now for the finishing touches and exporting your image out of Canva and into Pinterest. Firstly, you might want to add your logo to your design, you can do this with Canva’s uploader tool. You don’t have to plaster your pins with logos. Make it fairly small but still noticeable, if they can see your blog name on it somewhere this will be enough. It doesn’t need to dominate the image.
To get your pin ready for export check that your elements are aligned correctly. When you grab an element a pink cross guideline will highlight to show you the centre mark. Once you’re happy with your design go to publish in the top right.
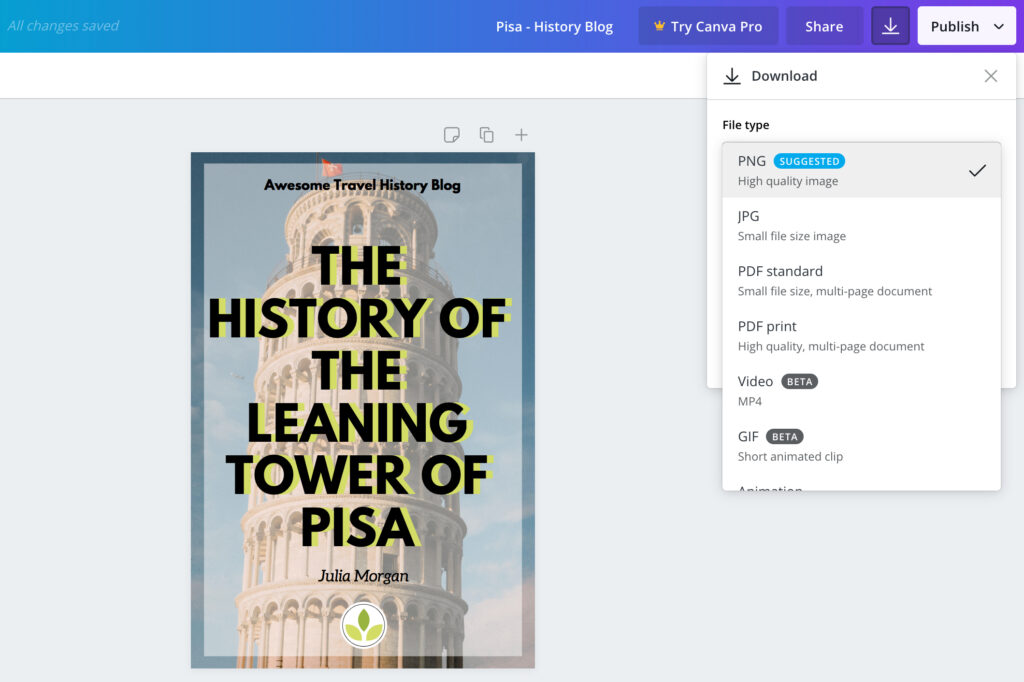
If you’re using the free version you won’t be able to directly upload to social media so you’ll need to download.
For a higher quality image choose PNG. This will make the image nice and sharp and is an acceptable file format for uploading onto Pinterest.
And that’s it!
Congratulations you’ve learnt to make your first Canva Pinterest pin!
Now all that’s left is to upload your pin to Pinterest and wait and see what happens. If your pins aren’t hitting the mark after a couple of weeks change up the way they look. You can create a new pin for the same blog post a few times over to see which design is grabbing the followers. Think simple. When you master the basics of design you can expand to work with more elements. And don’t be afraid to use presets and templates. They’re there for a reason and will help you familiarise yourself with what eye-catching design looks like.
Remember design, like art, is subjective. There is, of course, design rules to follow and there are ways to create a ‘good’ pin but ultimately what might interest one person won’t necessarily interest another. Give your boards time to grow, you might not be getting the hundreds of hits you’re expecting right away, but it might not be about the pin design.
Canva also has a course which can help you with learn graphic design:
https://designschool.canva.com/courses/graphic-design-basics/?lesson=design-to-communicate