What is Canva?
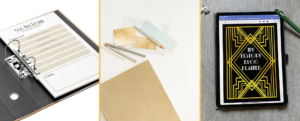
Did you know you can design a history blog logo for free? Canva is a free graphic design tool we have been using here at Smart History Blogging for the past couple of years. It’s helped us design all kinds of things from pins for Pinterest to thumbnails for our videos. But if you’re just getting started with blogging Canva can also be a useful tool to design a history blog logo for free
Now, first things first, make sure you’ve signed up to Canva and verified your email.
Let’s get started designing a history blog logo for free!
Step One – Choosing The Right Canvas Size
When you’ve signed up for your account head to the search bar. The quickest way to find what you need is by typing in logo. You’ll be presented with a range of choices but the one you’ll need for this is the 500×500 px option. It’s an ideal size for the logo to be used in multiple places including for podcast covers.
There’s a big selection of designs you could pick from and modify, but for this, I’m going to show you how to make one from scratch.

On this screen you can name your design, download, save, duplicate, add design notes, add a background, add elements (shapes, grids, frames, clip art etc) find photos/other images, upload your logo and more.
Lets go over some quick tips to help you create your design.
Step Two – Decide on Your Brand Colours
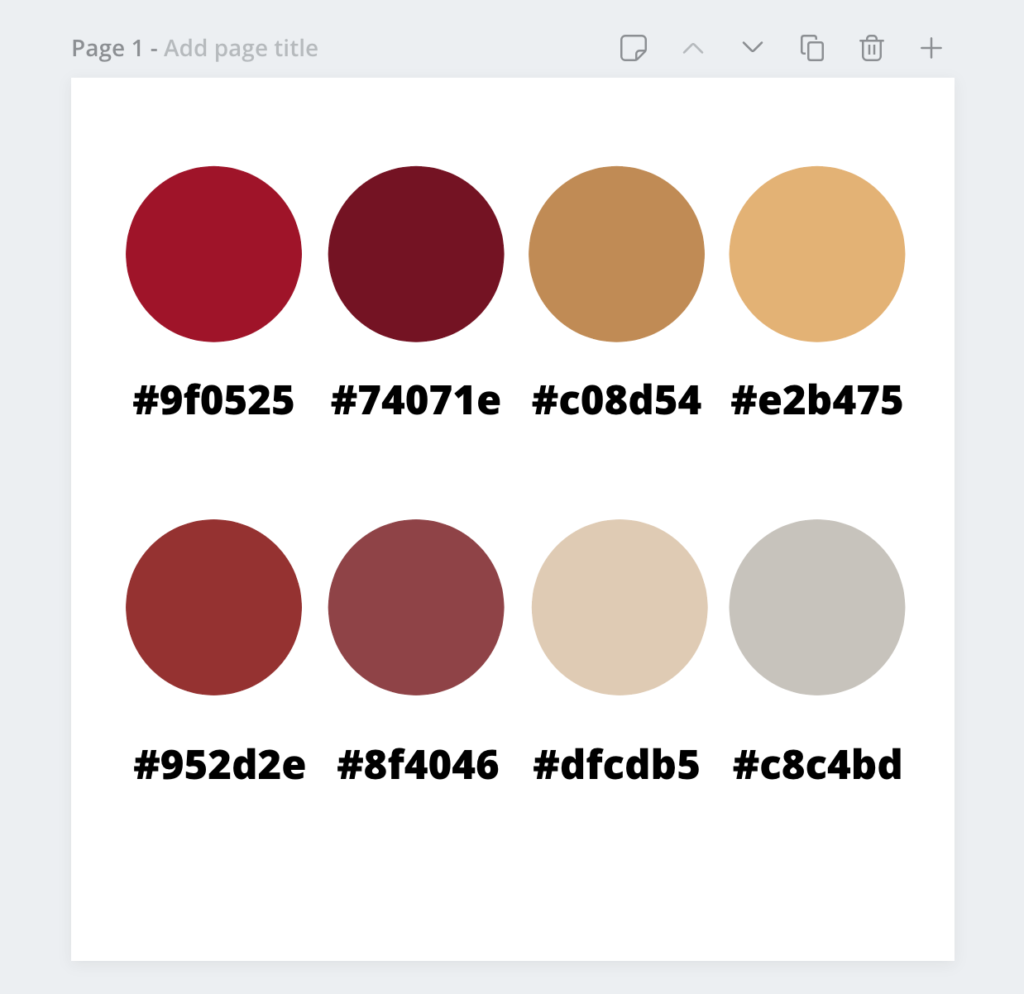
Colours for websites are represented by 6 digit codes called hex colour codes. When you’ve chosen colours you like the look of, or you want to use your brand colours, you can use these codes to keep everything you create consistent.
Here’s a quick tip for you that will save you time later on. Setting up your colour chart is great for when you’re moving between designs. On the free version of Canva you’ll be missing the option to export the design for multiple social media platforms. As you move to new designs you’ll have to add your brand colours again. It’s handy to have a colour chart saved in Canva so that you can quickly grab the colours you need. It’s not necessary to do this step of course but it is handy to have around.
Here’s the Smart History Blogging one: As you can see I simply added the colour to circles and put text underneath with the hex codes. That way I can copy/paste the hex colour code whenever I need it.
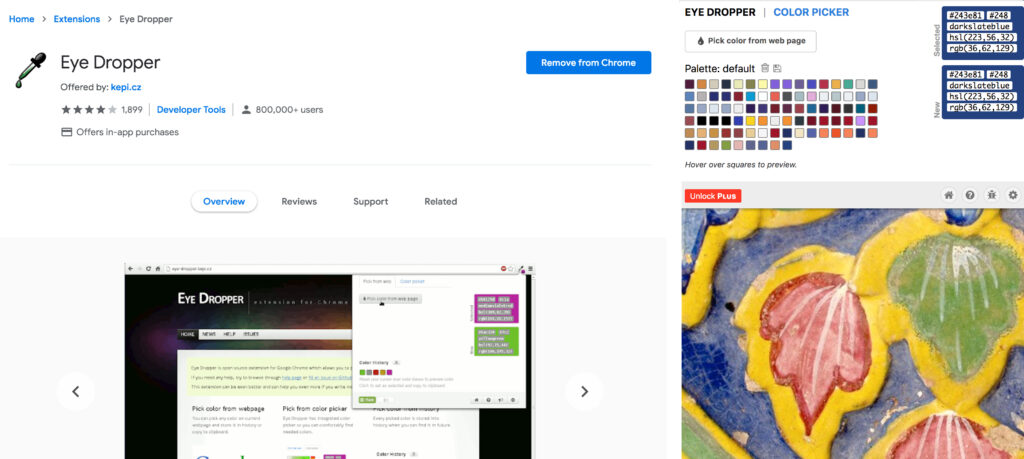
In addition, a useful tool to help you find hex codes is by using a Chrome extension called Eye Dropper. Again you don’t have to do this stage but it’s helpful if you’d like to select colours from anywhere on the web or even parts of your own designs. You can get the plugin here. Once added to Chrome it will appear in the top right corner where you can quickly access it and copy-paste the hex key (top left code.)
Step Three – Placing An Element
Ok so let’s start a design.
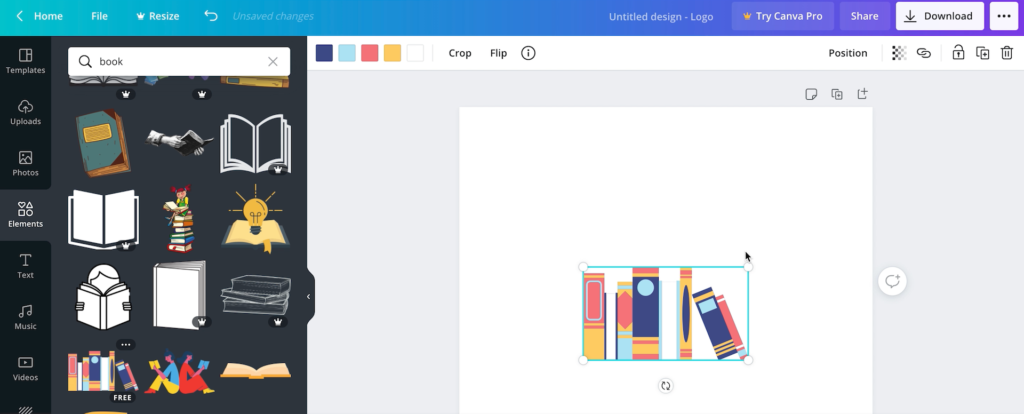
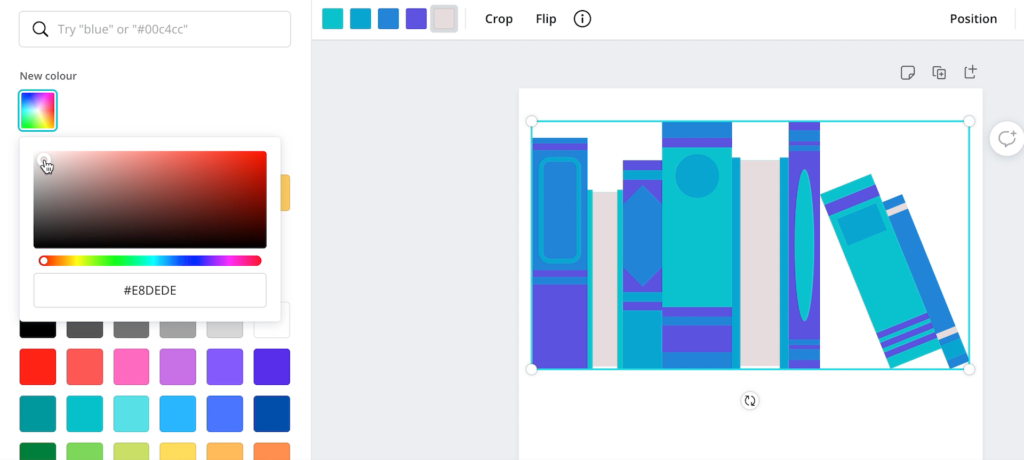
We’ll go to the elements tab and search for books. There are hundreds of elements to choose from, and while a lot of them are free to use, some are also available for purchase. Either by upgrading to the pro version of Canva or as a one-off purchase (normally around 99p).
If you need help with finding CC0 and copyright-free images you can use online we have a blog post to help you with that here.
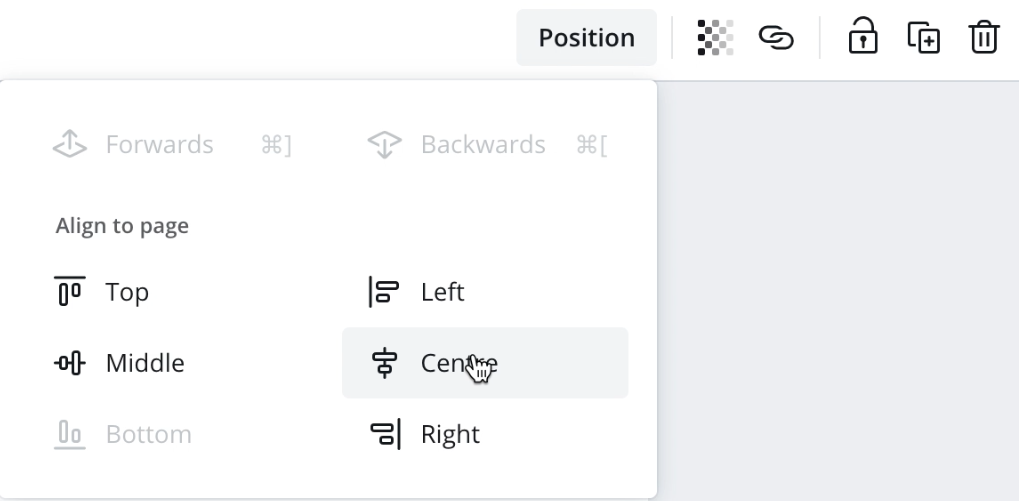
When you’ve chosen an element that you like the look of you can either drag it over to the canvas and drop or simply click it. To resize the element click and drag the dots around the edge. To move it around the canvas hover the mouse in the center of the image till the directional arrows appear then drag it into place. As you move things around on Canva you’ll notice pink guidelines appearing to help you center your work.
Or go to the top right where you’ll find a position tab which can quickly centre a single element for you.
Step Four – Adding Your Logo Colours
This is where choosing your brand colour in advance comes in handy. You can input the hex codes into the colour picker to keep all your branding consistent. But if you’ve not chosen your colours yet this is the perfect opportunity to experiment with colour choices.
Step Five – Adding Text and Choosing Fonts
Now we have the image part of the logo chosen lets move on to text. Again Canva has a lot of great options for this with combos of fonts that compliment each other. Choosing suitable fonts doesn’t need to be overly complicated, limit yourself to a maximum of three. Swirly detailed fonts might look nice but they are often difficult to read. Font sizing, line and letter spacing can be adjusted in the panel along the top.

One thing that’s, unfortunately, missing in Canva is the ability to outline or add a drop shadow to your text. But there’s a little hack you can try.
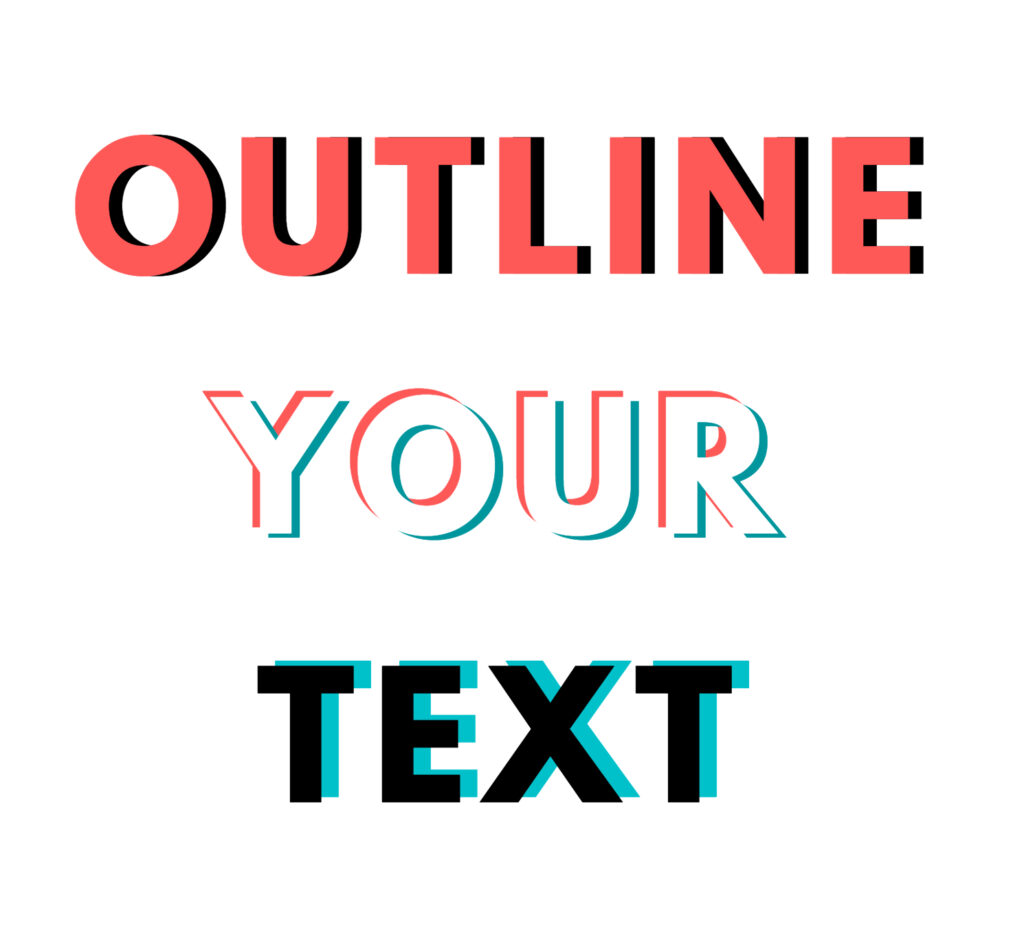
To create these simply copy and paste your font or use the duplicate button, make sure that the line and letter spacing is the same for both of the versions.
Change the colour of one of the lines of text to a more striking colour, then select it and using your keyboards directional keys (or your mouse) move them apart slightly.
For text with three colours like the one in the middle copy-paste the same text again and make it a different colour then offset as before.
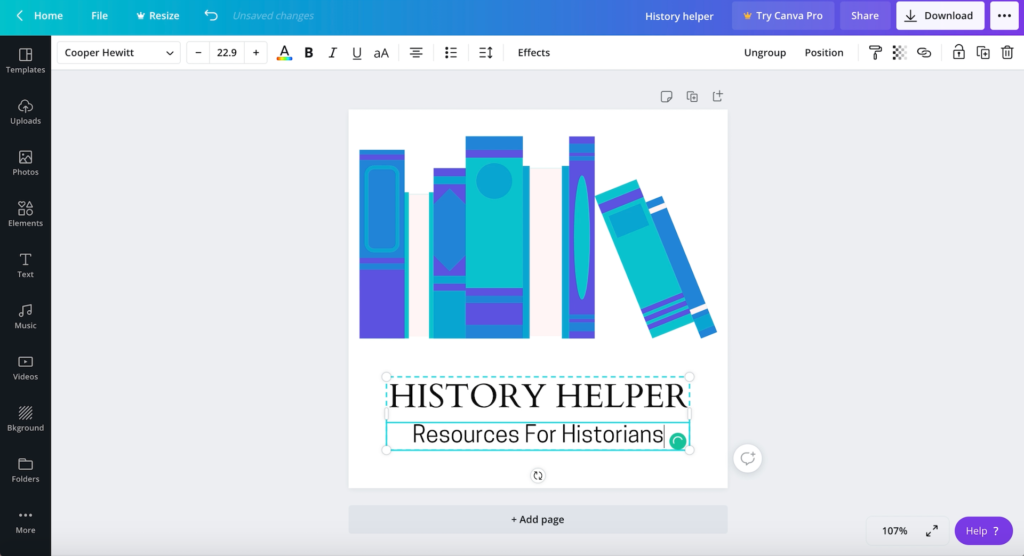
For this logo design we’re keeping it simple and sticking to a standard black and centered font.
Step Six – Optional Photo Backgrounds & Filters
But what if you want a background for your logo? That can be done with Canva too. Photos work the same way as the elements tab; choose/search for your image and drag and drop it onto the canvas. Because the image is larger than the canvas area it’ll clip it down, so to adjust the image double click the canvas.
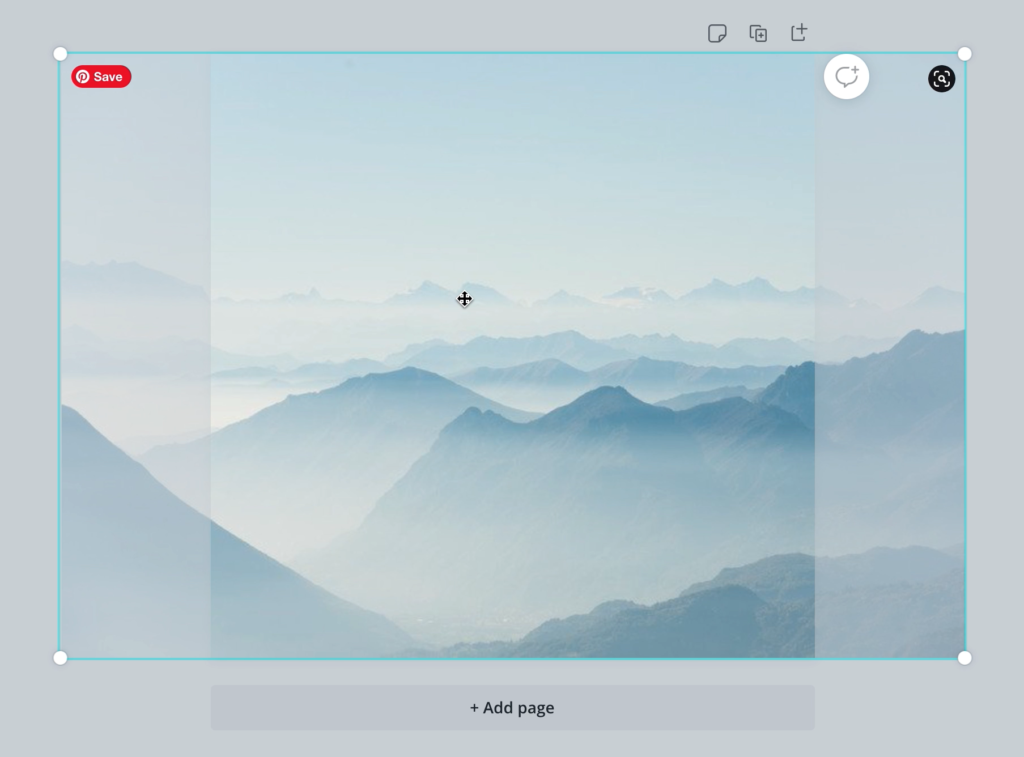
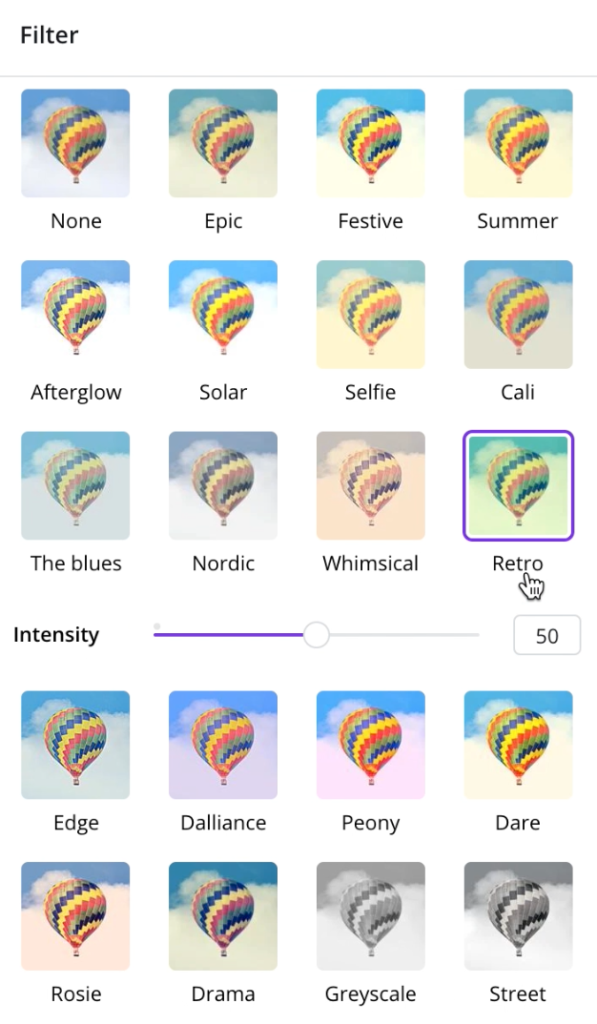
Photos can also be customised with a selection of filter pre sets. These can add a glow, increase colour saturation, make the image black and white etc.
Step Seven – Exporting Your Final Logo Design
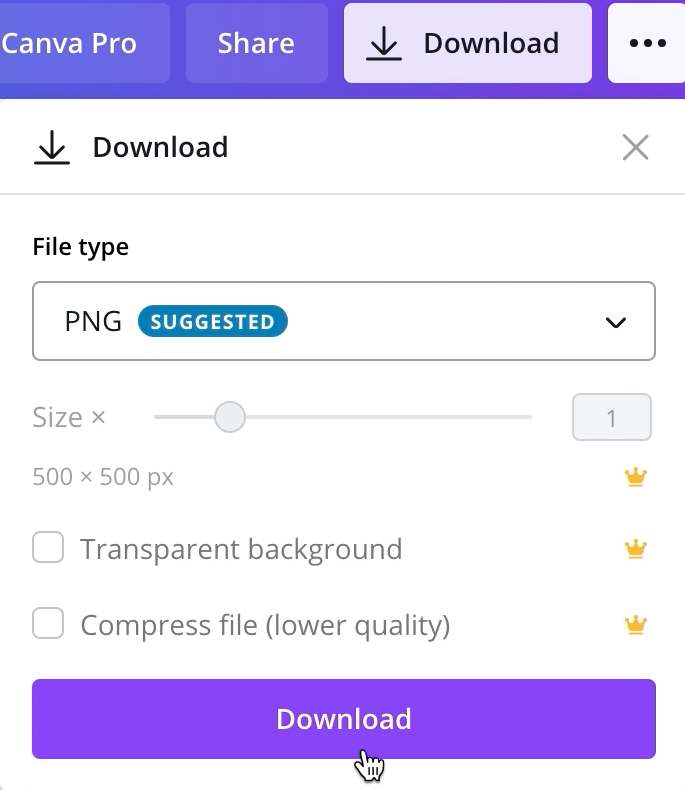
When you’re happy with your design you can export it in the top right-hand corner.
If you’re using the free version you won’t be able to directly upload to anywhere so you’ll need to download it.
For a higher quality image choose PNG. This will make the image nice and sharp and is an acceptable file format for uploading onto most platforms and web hosts.
And that’s how you design a history blog logo for free.
Congratulations you’ve learnt to make your Canva logo!